| Visual Basic サンプル集 |
|
|
Visual Basic 中学校 > Visual Basic サンプル集 > Visual Basic サンプル集目次 > Windows フォーム >
多角形を描画する
2020/12/20
このページで紹介するサンプルは Windowsフォームアプリケーションを前提にしています。
描画するタイミングについては下記にサンプルを参照してください。
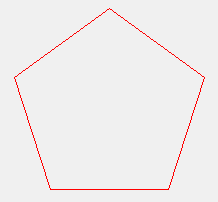
赤い五角形
![]()
![]()
![]()
![]()
![]()
![]()
![]()
![]()
![]()
![]()
| Private Sub
PictureBox1_Paint(sender
As Object, e As
PaintEventArgs)
Handles
PictureBox1.Paint '五角形の頂点の座標 Dim p1 As New Point(105, 10) Dim p2 As New Point(10, 79) Dim p3 As New Point(46, 191) Dim p4 As New Point(164, 191) Dim p5 As New Point(200, 79) '頂点を結んでできるパス(≒図形)を定義 Dim polygon As New Drawing2D.GraphicsPath() polygon.AddPolygon({p1, p2, p3, p4, p5}) 'パスを描画 e.Graphics.DrawPath(Pens.Red, polygon) End Sub |
実行結果
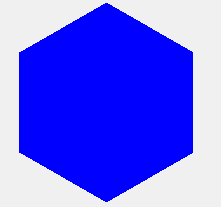
青く塗りつぶした六角形
![]()
![]()
![]()
![]()
![]()
![]()
![]()
![]()
![]()
![]()
| Private Sub
PictureBox1_Paint(sender As
Object, e As
PaintEventArgs)
Handles PictureBox1.Paint '六角形の頂点の座標 Dim p1 As New Point(97, 10) Dim p2 As New Point(10, 60) Dim p3 As New Point(10, 160) Dim p4 As New Point(97, 210) Dim p5 As New Point(184, 160) Dim p6 As New Point(184, 60) '頂点を結んでできるパス(≒図形)を定義 Dim polygon As New Drawing2D.GraphicsPath() polygon.AddPolygon({p1, p2, p3, p4, p5, p6}) 'パスを描画 e.Graphics.FillPath(Brushes.Blue, polygon) End Sub |
実行結果
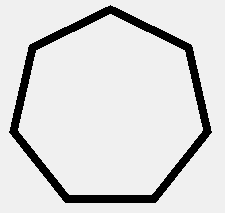
太い黒い枠線の七角形
![]()
![]()
![]()
![]()
![]()
![]()
![]()
![]()
![]()
![]()
| Private Sub
PictureBox1_Paint(sender As
Object, e As
PaintEventArgs)
Handles PictureBox1.Paint '七角形の頂点の座標 Dim p1 As New Point(107, 10) Dim p2 As New Point(29, 48) Dim p3 As New Point(10, 132) Dim p4 As New Point(64, 200) Dim p5 As New Point(150, 200) Dim p6 As New Point(204, 132) Dim p7 As New Point(185, 48) '頂点を結んでできるパス(≒図形)を定義 Dim polygon As New Drawing2D.GraphicsPath() polygon.AddPolygon({p1, p2, p3, p4, p5, p6, p7}) 'パスを描画 Dim pen As New Pen(Color.Black, 8) '太さ8の黒いペン e.Graphics.DrawPath(pen, polygon) End Sub |
実行結果
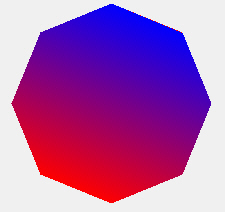
線形のグラデーションで塗りつぶされた八角形
![]()
![]()
![]()
![]()
![]()
![]()
| Private Sub
PictureBox1_Paint(sender As
Object, e As
PaintEventArgs)
Handles PictureBox1.Paint '八角形の頂点の座標 Dim p1 As New Point(110, 10) Dim p2 As New Point(39, 39) Dim p3 As New Point(10, 110) Dim p4 As New Point(39, 181) Dim p5 As New Point(110, 210) Dim p6 As New Point(181, 181) Dim p7 As New Point(210, 110) Dim p8 As New Point(181, 39) '頂点を結んでできるパス(≒図形)を定義 Dim polygon As New Drawing2D.GraphicsPath() polygon.AddPolygon({p1, p2, p3, p4, p5, p6, p7, p8}) '頂点1(p1)を青、頂点4(p4)を赤として、徐々に変化する色で塗りつぶすブラシを作成 Dim gradientBrush As New Drawing2D.LinearGradientBrush(p1, p4, Color.Blue, Color.Red) '塗りつぶした八角形を描画 e.Graphics.FillPath(gradientBrush, polygon) End Sub |
メモ:Dim gradientBrush As ... の行を改行せずに1行で書くか、改行記号(半角スペースと_)で改行すればVB2008以前でもこの例が使用できます。
実行結果
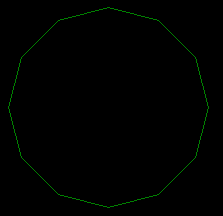
正n角形
この例の DrawPolygon メソッドは引数で指定した n角形を描画します。
このサンプルでは 12 を指定して12角形を描画します。
![]()
![]()
![]()
![]()
![]()
![]()
![]()
![]()
![]()
![]()
| Private Sub
PictureBox1_Paint(sender
As Object, e As
PaintEventArgs)
Handles
PictureBox1.Paint 'サイズ100の正12角形を描画します。 DrawPolygon(12, 100, e.Graphics) End Sub ''' <summary> ''' 正多角形を描画します。 ''' </summary> ''' <param name="index">角の数。六角形の場合6。</param> ''' <param name="size">大きさ。この多角形の外接円の半径。</param> ''' <param name="g">この図形を描画するGraphicsオブジェクト。Paintイベント内でe.Graphicsなどで取得できます。</param> Private Sub DrawPolygon(index As Integer, size As Integer, g As Graphics) '▼各頂点の座標を算出 '原点を中心としたときの各頂点の座標を算出します。 '中心角(360度)をn等分したときの1角あたりの角度(単位はラジアン) Dim degree As Double = (Math.PI * 2) / index Dim points As New List(Of Point) For i As Integer = 0 To index - 1 '点0から点iの角度(角 点1-O-点iの角度)に180度加えたもの。単位はラジアン。 '180度 = Math.PIラジアン '180度加えなくても良いのですが、学校数学とy軸の方向が逆になっているので、180度加えることで、 '学校数学でなじんだような配置になります。 Dim thisDegree As Double = degree * i + Math.PI '点iのx座標 Dim x As Double = Math.Sin(thisDegree) * size '点iのy座標 Dim y As Double = Math.Cos(thisDegree) * size 'この点を記憶しておく points.Add(New Point(CInt(x), CInt(y))) Next '▼全体が見えるように平行移動させる '原点を中心とした座標だと第1象限~第4象限のすべてが使用されますが、 'コンピューターは既定では第1象限しか描画・表示しないのですべての点が第1象限に収まるように '図形を平行移動させます。 'TranslateTransformを使うと一撃で平行移動できます。 '第4象限まで見えるように平行移動させる。(既定では第1象限しか表示されていない。) 'g.TranslateTransform(size, size) '←これで移動すると一撃です。 'あえて、すべての頂点の座標を再計算して第1象限に平行移動するには下記のようにします。 Dim offsetX As Integer = Math.Abs(Aggregate p In points Select p.X Into Min) Dim offsetY As Integer = Math.Abs(Aggregate p In points Select p.Y Into Min) offsetX += 10 '上側に余白として 10ピクセルの隙間を空けます。 offsetY += 10 '左側に余白として 10ピクセルの隙間を空けます。 For i As Integer = 0 To points.Count - 1 points(i) = New Point(points(i).X + offsetX, points(i).Y + offsetY) 'Debug.Print(points(i).ToString) '算出後の座標を出力します。 Next '▼描画 '背景色黒 g.Clear(Color.Black) '座標を配列化して間を線で結ぶ。 g.DrawPolygon(Pens.Green, points.ToArray) End Sub |
実行結果
![]() VB6では Line を複数使用して多角形を描画します。高度なグラフィックスはDirectXやGDIなど外部の機能を呼び出して実現します。
VB6では Line を複数使用して多角形を描画します。高度なグラフィックスはDirectXやGDIなど外部の機能を呼び出して実現します。