| Visual Basic サンプル集 |
|
|
Visual Basic 中学校 > Visual Basic サンプル集 > Visual Basic サンプル集目次 > Windows フォーム >
三角形を描画する
2020/12/6
目次
このページで紹介するサンプルは Windowsフォームアプリケーションを前提にしています。
描画するタイミングについては下記にサンプルを参照してください。
PictureBoxに赤い三角形を描画する
![]()
![]()
![]()
![]()
![]()
![]()
![]()
![]()
![]()
![]()
| Private Sub
PictureBox1_Paint(sender
As Object, e As
PaintEventArgs)
Handles
PictureBox1.Paint '三角形の頂点の座標 Dim p1 As New Point(100, 0) Dim p2 As New Point(200, 173) Dim p3 As New Point(0, 173) '頂点を結んでできるパス(≒図形)を定義 Dim triangle As New Drawing2D.GraphicsPath() triangle.AddPolygon({p1, p2, p3}) 'パスを描画 e.Graphics.DrawPath(Pens.Red, triangle) End Sub |
実行結果
Formに青い三角形を描画する
![]()
![]()
![]()
![]()
![]()
![]()
![]()
![]()
![]()
![]()
| Private Sub
Form1_Paint(sender As
Object, e As
PaintEventArgs)
Handles
MyBase.Paint '三角形の頂点の座標 Dim p1 As New Point(100, 0) Dim p2 As New Point(200, 173) Dim p3 As New Point(0, 173) '頂点を結んでできるパス(≒図形)を定義 Dim triangle As New Drawing2D.GraphicsPath() triangle.AddPolygon({p1, p2, p3}) 'パスを描画 e.Graphics.DrawPath(Pens.Blue, triangle) End Sub |
黒い枠線に黄色く塗りつぶした三角形
![]()
![]()
![]()
![]()
![]()
![]()
![]()
![]()
![]()
![]()
| Private Sub
PictureBox1_Paint(sender
As Object, e As
PaintEventArgs)
Handles
PictureBox1.Paint '三角形の頂点の座標 Dim p1 As New Point(100, 0) Dim p2 As New Point(200, 173) Dim p3 As New Point(0, 173) '頂点を結んでできるパス(≒図形)を定義 Dim triangle As New Drawing2D.GraphicsPath() triangle.AddPolygon({p1, p2, p3}) 'パスを描画 e.Graphics.FillPath(Brushes.Yellow, triangle) e.Graphics.DrawPath(Pens.Black, triangle) End Sub |
実行結果
太い黒い枠線に黄色く塗りつぶした三角形
![]()
![]()
![]()
![]()
![]()
![]()
![]()
![]()
![]()
![]()
| Private Sub
PictureBox1_Paint(sender
As Object, e As
PaintEventArgs)
Handles
PictureBox1.Paint '三角形の頂点の座標 Dim p1 As New Point(110, 10) Dim p2 As New Point(210, 183) Dim p3 As New Point(10, 183) '頂点を結んでできるパス(≒図形)を定義 Dim triangle As New Drawing2D.GraphicsPath() triangle.AddPolygon({p1, p2, p3}) 'パスを描画 Dim pen As New Pen(Color.Black, 8) '太さ8の黒いペン e.Graphics.FillPath(Brushes.Yellow, triangle) e.Graphics.DrawPath(pen, triangle) End Sub |
実行結果
カスタムな色の枠線と塗りつぶし
赤・ 緑・ 青を合成した色で円を描画します。赤・緑・青の各色は0~255の範囲で指定できます。
![]()
![]()
![]()
![]()
![]()
![]()
![]()
![]()
![]()
![]()
| Private Sub
PictureBox1_Paint(sender
As Object, e As
PaintEventArgs)
Handles
PictureBox1.Paint '三角形の頂点の座標 Dim p1 As New Point(110, 10) Dim p2 As New Point(210, 183) Dim p3 As New Point(10, 183) '頂点を結んでできるパス(≒図形)を定義 Dim triangle As New Drawing2D.GraphicsPath() triangle.AddPolygon({p1, p2, p3}) '▼塗りつぶし Dim fillColor As Color = Color.FromArgb(42, 210, 240) '赤42,緑210,青240 の合成色 Dim brush As New SolidBrush(fillColor) 'カスタムな色の単色ブラシ e.Graphics.FillPath(brush, triangle) '▼枠線 Dim borderColor As Color = Color.FromArgb(200, 210, 20) '赤200,緑210,青20 の合成色 Dim pen As New Pen(borderColor, 8) '太さ8のカスタムな色のペン e.Graphics.DrawPath(pen, triangle) End Sub |
実行結果
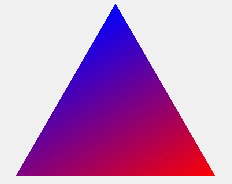
線形のグラデーションで塗りつぶされた三角形
![]()
![]()
![]()
![]()
![]()
![]()
| Private Sub
PictureBox1_Paint(sender
As Object, e As
PaintEventArgs)
Handles
PictureBox1.Paint '三角形の頂点の座標 Dim p1 As New Point(110, 10) Dim p2 As New Point(210, 183) Dim p3 As New Point(10, 183) '頂点を結んでできるパス(≒図形)を定義 Dim triangle As New Drawing2D.GraphicsPath() triangle.AddPolygon({p1, p2, p3}) '頂点1(p1)を青、頂点2(p2)を赤として、徐々に変化する色で塗りつぶすブラシを作成 Dim gradientBrush As New Drawing2D.LinearGradientBrush(p1, p2, Color.Blue, Color.Red) '塗りつぶした三角形を描画 e.Graphics.FillPath(gradientBrush, triangle) End Sub |
メモ:Dim gradientBrush As ... の行を改行せずに1行で書くか、改行記号(半角スペースと_)で改行すればVB2008以前でもこの例が使用できます。
実行結果
放射状(円形)のグラデーションで塗りつぶされた三角形
![]()
![]()
![]()
![]()
![]()
![]()
![]()
![]()
![]()
![]()
| Private Sub
PictureBox1_Paint(sender
As Object, e As
PaintEventArgs)
Handles
PictureBox1.Paint '●1.三角形の定義 '▼1-1.三角形の頂点の座標 Dim p1 As New Point(110, 10) Dim p2 As New Point(210, 183) Dim p3 As New Point(10, 183) '▼1-2.頂点を結んでできるパス(≒図形)を定義 Dim triangle As New Drawing2D.GraphicsPath() triangle.AddPolygon({p1, p2, p3}) '●2.グラデーションの定義 '外接円の範囲に放射状のグラデーションを定義します。 'そのためには外接円の中心の座標と半径を求める必要があります。 '▼2-1.外接円の中心の座標 Dim center As Point center.X = CInt((p1.X + p2.X + p3.X) / 3) center.Y = CInt((p1.Y + p2.Y + p3.Y) / 3) '▼2-2.外接円の半径 'まず、三角形の各辺の長さを求めます。(ピタゴラスの定理を使用します。) Dim L12 As Double = Math.Sqrt((p1.X - p2.X) ^ 2 + (p1.Y - p2.Y) ^ 2) Dim L23 As Double = Math.Sqrt((p2.X - p3.X) ^ 2 + (p2.Y - p3.Y) ^ 2) Dim L31 As Double = Math.Sqrt((p3.X - p1.X) ^ 2 + (p3.Y - p1.Y) ^ 2) '次に三角形の面積を求めます。(ヘロンの公式を使用します。) Dim heronNumber As Double = (L12 + L23 + L31) / 2 Dim s As Double = Math.Sqrt(heronNumber * (heronNumber - L12) * (heronNumber - L23) * (heronNumber - L31)) '最後に外接円の半径を求めます。 Dim r As Double = (L12 * L23 * L31) / (4 * s) '▼2-3.ブラシの定義 Dim path As New Drawing2D.GraphicsPath() path.AddEllipse(New Rectangle(center.X - CInt(r), center.Y - CInt(r), CInt(r * 2), CInt(r * 2))) '中央を青、周辺を赤として、徐々に変化する色で塗りつぶすブラシを作成 Dim gradientBrush As New Drawing2D.PathGradientBrush(path) gradientBrush.CenterColor = Color.Blue gradientBrush.SurroundColors = {Color.Red} '●3.塗りつぶした三角形を描画 e.Graphics.FillPath(gradientBrush, triangle) End Sub |
メモ:どうもグラデーションの中心と三角形の中心が一致しないようです。原因はわかりません。ごめんなさい。
実行結果
模様で塗りつぶされた三角形
![]()
![]()
![]()
![]()
![]()
![]()
![]()
![]()
![]()
![]()
| Private Sub
PictureBox1_Paint(sender
As Object, e As
PaintEventArgs)
Handles
PictureBox1.Paint '三角形の頂点の座標 Dim p1 As New Point(110, 10) Dim p2 As New Point(210, 183) Dim p3 As New Point(10, 183) '頂点を結んでできるパス(≒図形)を定義 Dim triangle As New Drawing2D.GraphicsPath() triangle.AddPolygon({p1, p2, p3}) '紙ふぶきのような模様のブラシを作成 Dim hatchBrush As New Drawing2D.HatchBrush(Drawing2D.HatchStyle.LargeConfetti, Color.Yellow) '塗りつぶした三角形を描画 e.Graphics.FillPath(hatchBrush, triangle) End Sub |
メモ:模様は50種類程度用意されています。LargeConfettiの部分を他の値に変えることで模様を変えられます。
メモ:HatchBrushのBackgroundColorプロパティで背景色も指定できます。この例では省略しており省略すると黒です。
実行結果
画像のテクスチャーで塗りつぶされた三角形
![]()
![]()
![]()
![]()
![]()
![]()
![]()
![]()
![]()
![]()
| Private Sub
PictureBox1_Paint(sender
As Object, e As
PaintEventArgs)
Handles
PictureBox1.Paint '三角形の頂点の座標 Dim p1 As New Point(110, 10) Dim p2 As New Point(210, 183) Dim p3 As New Point(10, 183) '頂点を結んでできるパス(≒図形)を定義 Dim triangle As New Drawing2D.GraphicsPath() triangle.AddPolygon({p1, p2, p3}) 'テクスチャーブラシ作成 Dim textureBrush As New TextureBrush(Image.FromFile("C:\temp\renga.png")) 'renga.pngを敷き詰めた三角形を描画 e.Graphics.FillPath(textureBrush, triangle) End Sub |
実行結果

実行結果は元となる画像によって異なります。この例では使っている renga.png は下記画像です。
![]()
二重線の三角形
![]()
![]()
![]()
![]()
![]()
![]()
![]()
![]()
![]()
![]()
| Private Sub
PictureBox1_Paint(sender
As Object, e As
PaintEventArgs)
Handles
PictureBox1.Paint '三角形の頂点の座標 Dim p1 As New Point(110, 10) Dim p2 As New Point(210, 183) Dim p3 As New Point(10, 183) '頂点を結んでできるパス(≒図形)を定義 Dim triangle As New Drawing2D.GraphicsPath() triangle.AddPolygon({p1, p2, p3}) 'パスを描画 Dim pen As New Pen(Color.Red, 8) '太さ8の赤いペン '線の区切りを定義する。各区間は順に描画区間、空白区間、描画区間、空白区間・・・となる。 'この例では第1区間(描画)は0~33%, 第2区間(空白)は33~66%、第3区間(描画)は66%~100%となる。 '結果として中央に空白のある二重線となる。 pen.CompoundArray = {0, 0.33, 0.67, 1.0} e.Graphics.DrawPath(pen, triangle) End Sub |
実行結果
三重線の三角形
![]()
![]()
![]()
![]()
![]()
![]()
![]()
![]()
![]()
![]()
| Private Sub
PictureBox1_Paint(sender
As Object, e As
PaintEventArgs)
Handles
PictureBox1.Paint '三角形の頂点の座標 Dim p1 As New Point(110, 10) Dim p2 As New Point(210, 183) Dim p3 As New Point(10, 183) '頂点を結んでできるパス(≒図形)を定義 Dim triangle As New Drawing2D.GraphicsPath() triangle.AddPolygon({p1, p2, p3}) 'パスを描画 Dim pen As New Pen(Color.Red, 8) '太さ8の赤いペン '線の区切りを定義する。各区間は順に描画区間、空白区間、描画区間、空白区間・・・となる。 'この例では第1区間(描画)は0~20%, 第2区間(空白)は20~40%、第3区間(描画)は40%~60%・・・となる。 '結果として描画区間が3つある三重線になる。 pen.CompoundArray = {0, 0.2, 0.4, 0.6, 0.8, 1} e.Graphics.DrawPath(pen, triangle) End Sub |
実行結果
![]() VB6では Line を複数回使用して三角形を描画します。高度なグラフィックスはDirectXやGDIなど外部の機能を呼び出して実現します。
VB6では Line を複数回使用して三角形を描画します。高度なグラフィックスはDirectXやGDIなど外部の機能を呼び出して実現します。